There are many different mobile devices in today’s world and making responsive animations for all of them can be pretty challenging. Take a closer look at how this is possible in React Native by introducing an awesome library called Reanimated.
I imagine most of the people reading this already know how great the framework React Native is. However, there may be some curious heads that opened this blog post with an intent to learn something completely new or maybe you stumbled upon this at 3 AM when your original goal was to surf the web for a while right before going to bed (we all know how this goes 😉).
Well, for all of those who were wondering – React Native is an open-source UI, JavaScript framework that allows developing cross-platform mobile applications while writing only a single codebase. Awesome right? Just wait until we get to the animation part 😎.
Why Animations?
Animations play an important role while using a mobile app since they create a great and pleasant experience. They give the app some action and excitement, which you wouldn’t get while just showing some basic static screens.
However, animations don’t need to be this big thing that constantly swooshes on and off the screen and distracts the user. They can be small, subtle changes and still very effective. In the end, whatever the animation, the most important thing is they are always smooth and responsive on all devices.

Keeping this in mind, React Native comes with a built-in animation library called Animated, which is a great out-of-the-box solution for animating components on the screen. It allows you to build simple or complex animations that run smoothly on mobile devices, at least most of the time.
So, this ‘’most of the time’’ is quite important. Because it is not the same as “always”. Using the Animated library sometimes won’t be good enough to deliver the best product possible. I am sure you can agree that a product with cool animations that don’t run smoothly is actually not cool, even if you are not a perfectionist.

To better understand why the Animated library sometimes doesn't offer the best results, we should first look at how React Native does things under the hood and, secondly, learn more about the solution to this problem – the React Native Reanimated library.
Processing Animations
As already mentioned above, React Native is a framework that allows us to write application code in JavaScript. This means we are not using platform-specific languages like Swift or Kotlin/Java, yet, somehow, we still end up with native application components and artifacts.
This is possible because React Native works with two separate threads:
- JavaScript (JS) thread
- Native (UI) thread
The JavaScript code we write is executed on its thread and is later transformed and communicated to the Native (UI) thread. This communication layer between the two threads is called the React Native Bridge.

The problem we then face when using the React Native Animation library is that some of the animations and their properties are dependent on the communication between the JavaScript (JS) thread and the UI thread. This means that some animated values are calculated on the JavaScript side and sent over to the bridge. Meanwhile, we cannot perform any tasks on the UI thread.
Furthermore, the animation calculations are not the only thing to be executed on the JS thread. As a result, we cannot expect to get super-fast response times for animation calculations while the JS thread is busy rendering a component or fetching some data.
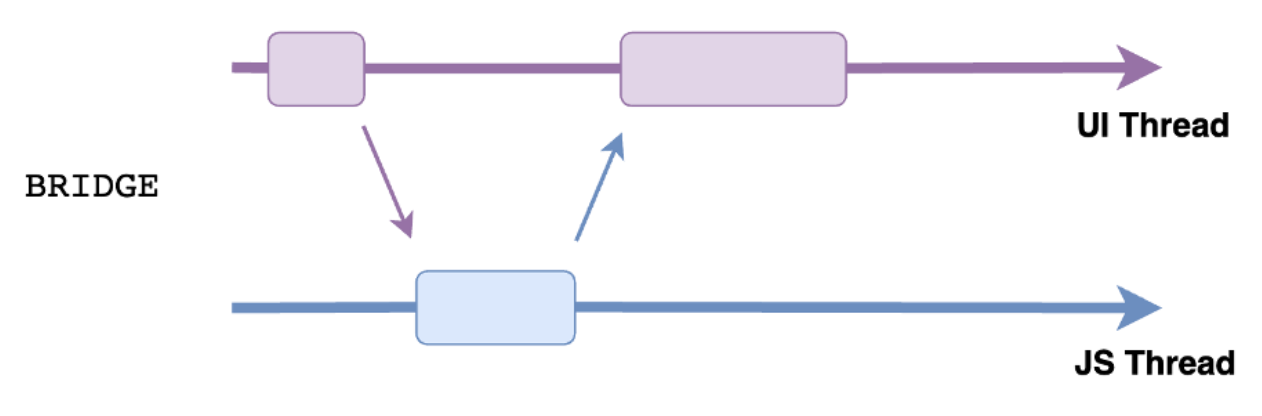
This kind of behaviour can result in frame drops while animating components 😱 and is the one thing we don’t want to happen when someone is using our app.
What can we do to avoid the possibility of getting frame drops?
The solution is simple. We move all the animation declarations and calculations to the UI thread.
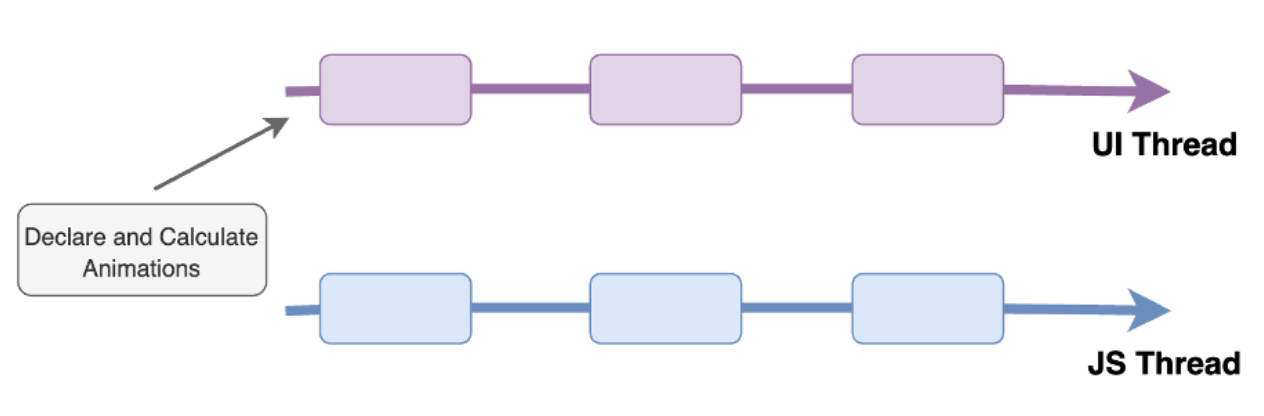
Now, even if the JS thread is occupied, the UI thread will process all of our animated values and smoothly present anything on the screen. We can achieve this kind of behaviour with an impressive React Native library called Reanimated.
Reanimated
Reanimated is a re-implementation of the React Native Animated library where we can develop clean, effective and responsive animations for any mobile device by introducing animation worklets.
Worklets
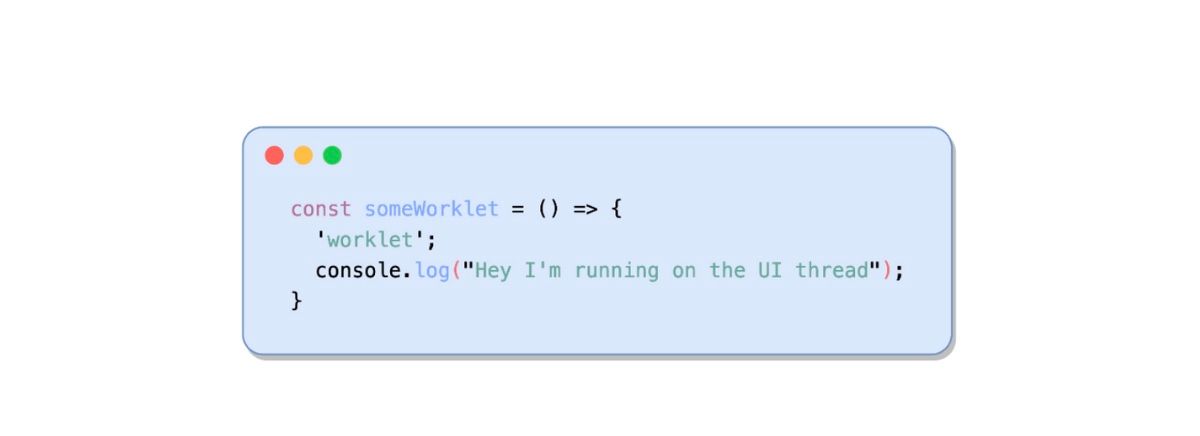
Worklets are JavaScript functions that run on the UI thread to compute animation frames. The only thing needed to convert a normal JavaScript function to a worklet is to add a ‘’worklet’’ directive at the top. All of the important stuff is then done under the hood by Reanimated. Below is a simple example of an animation worklet.
However, we don't usually create them ourselves, as Reanimated comes with a predefined set of powerful worklets that we can use. Combined correctly, they enable us to prepare awesome animations throughout the whole app. We will go through the most commonly used worklets and see some cool use cases. 🚀
Shared Values and Animation Styles
To process animations, worklets operate with shared values – these are animation values available on both the UI and JS thread. We can initialize a shared value by using the useSharedValue() hook. Then, these values can be accessed and updated by just using its value property. Easy, peasy 🍋, squeezy, right?

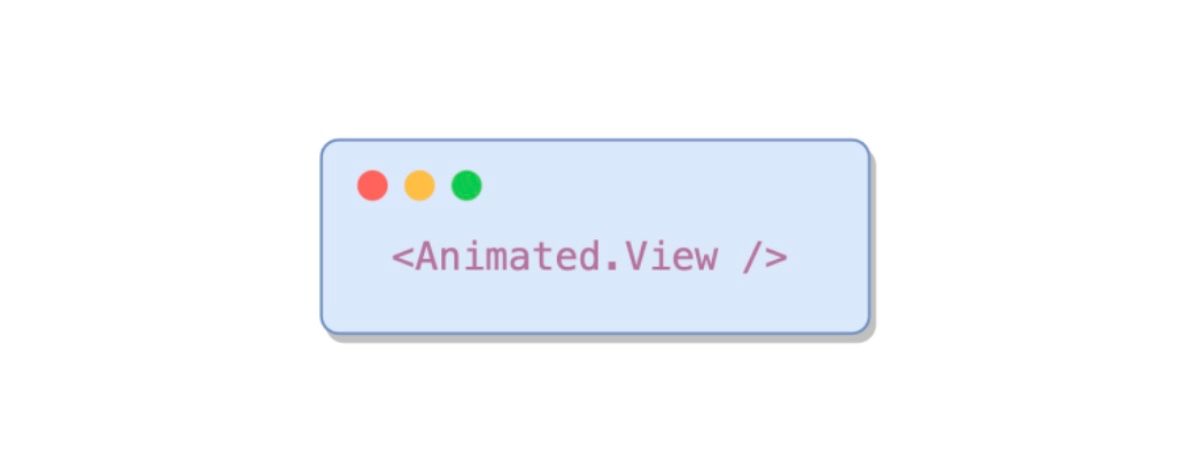
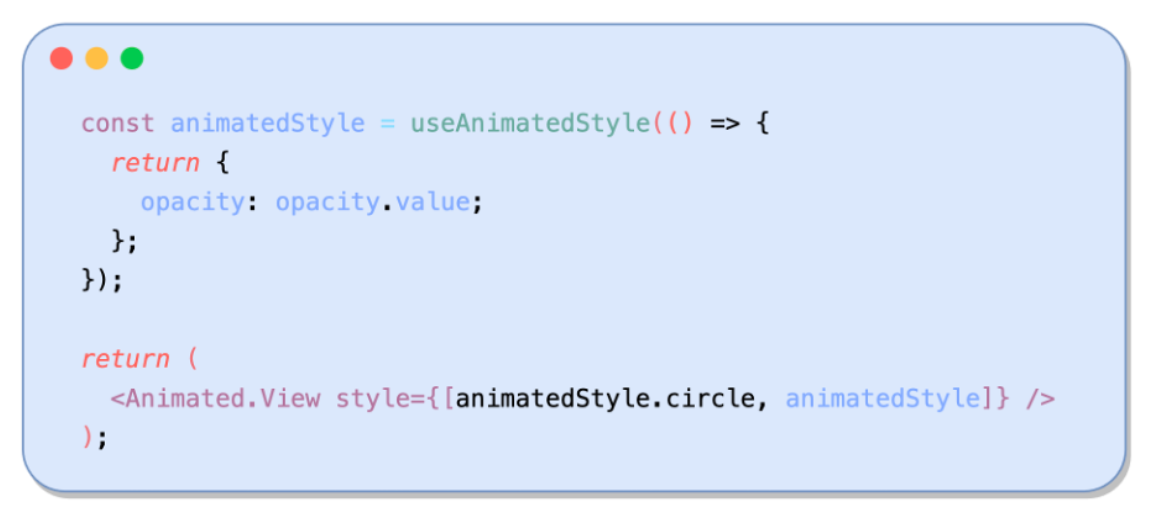
The components we want to animate need to be able to recognize the use of animated values. We can achieve this by using the Animated component that Reanimated provides us with.
Furthermore, shared values cannot be incorporated into components as style values because they are located on the UI thread. For this to be possible, we must create an animated style object. We can do that by using the useAnimatedStyle() hook, which allows you to create an association between shared values and component properties.
By combining these small pieces of knowledge, we got a fundamental understanding of how Reanimated works.
Let’s do a quick recap:
- Initialize a shared value by using the useSharedValue() hook.
- Use the Animated component to make it aware of shared values.
- Declare and define animated styles with useAnimatedStyle().
- Pass the styles to your component.
Now all that’s left to do is to somehow update these shared values in a way that will animate the connected components.

Animation Methods
Once you master the basics, Reanimated makes it simple to take it to the next level and add some smooth animations. The library comes with several animation methods that can help you change shared values from immediate property updates into animated ones.
Most common animation methods:
- withTiming()
- withSpring()
- interpolate()
1. Method WithTiming()
We can change a shared value by applying the withTiming() method while starting a time-based animation. When executed, the UI thread changes the animated variable to a specified value in a certain timespan.
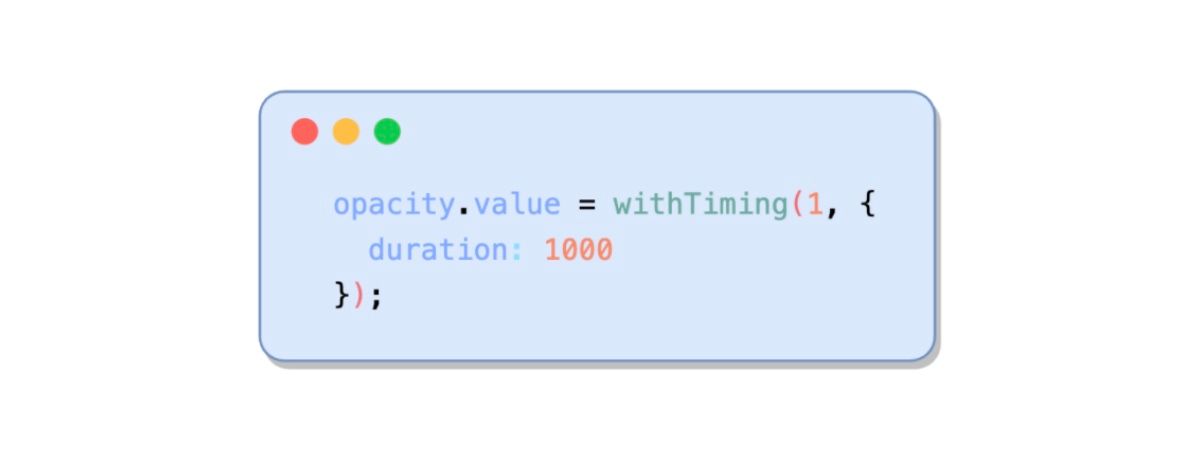
The method can be used in various scenarios. Below is a simple example of applying the withTiming() method to change the block's horizontal position.
2. Method WithSpring()
The withSpring() method has a quite similar behaviour as the withTiming() method. When executed, a spring-based animation starts, animating a shared variable to the specified value we pass as the argument. The method also accepts a configuration object we can use to tweak the animation if we want to.
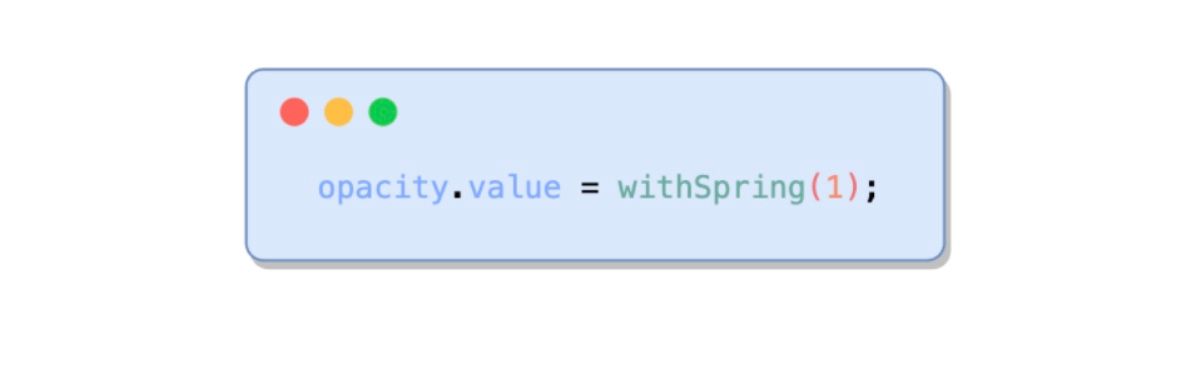
Below we can see the animation from before, but instead of withTiming() we used withSpring().
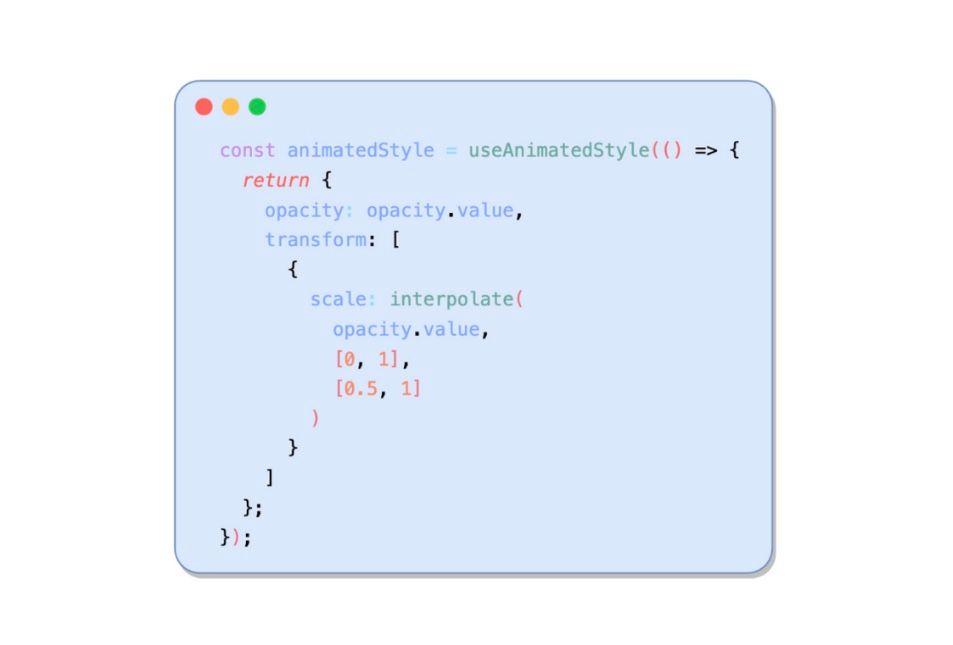
3. Method Interpolate()
Another beneficial method that Reanimated has predefined is the interpolate() method. When used, the interpolate() method allows us to update a value based on another value we are animating.
There are three core arguments we have to pass to the interpolate() method:
- value we observe
- input range
- output range
Below is a code example where we would like to scale a component based on its opacity. For example, when the opacity is at 0, we want our component to be scaled down to 0.5 and when the opacity is at 1, we would like to scale it to 1. The interpolate() method lets you map the opacity value inside the input range to the corresponding approximation of scale in the output range.
Below is what an animation with similar parameters would look like inside the app.
Wrap Up
There are still a lot of amazing features Reanimated offers – from canceling animations to sequencing or replaying them, reacting to user gestures (taping, scrolling) and much more. This is sadly out of this blog’s scope 😢, but we might focus on other features in one of our upcoming blogs.
You’ve just read that only a small fraction of animations are possible to achieve in the Reanimated land 🎡. Find out more in their official docs. Then, to get you motivated and fired up about learning other excellent features, please find some interesting examples below that show what you can develop using Reanimated.
Finally, don’t forget what we have learned! All of the animations done by Reanimated are happening on the UI thread, making them smooth even on the low-end devices and improving the experience of our end users. Exactly what we want to achieve when developing applications, do you agree?
